Deprecated: mb_convert_encoding(): Handling HTML entities via mbstring is deprecated; use htmlspecialchars, htmlentities, or mb_encode_numericentity/mb_decode_numericentity instead in /home/u598013642/domains/motorcyclegear101.com/public_html/wp-content/themes/acabado/functions.php on line 1901
Deprecated: mb_convert_encoding(): Handling HTML entities via mbstring is deprecated; use htmlspecialchars, htmlentities, or mb_encode_numericentity/mb_decode_numericentity instead in /home/u598013642/domains/motorcyclegear101.com/public_html/wp-content/themes/acabado/functions.php on line 1901
Scratching your motorcycle windshield can be easy to do. Some bikers would change the windshield, but I found a simple way to remove the scratches, and you know what? It’s really simple to do.
How To Remove Scratches From Plastic Motorcycle Windshield? There are no special tools needed to remove scratches from a plastic motorcycle windscreen. All you need is a clean towel, some water, sandpaper, and a plastic rubbing compound.
Hey, guys, today, I’m going to show you how you can quickly and relatively inexpensively remove scratches from your motorcycle windscreens.
I live in a state where we get tons of bugs, especially at night. Frankly, some of them have freaking armor on them, and my motorcycle screen gets beat up.
Every few years, I put a new screen on it because I don’t like having to look through scratches. The same thing goes with home visors. If I get a big scratch and I can’t polish it out, or if it’s just old, I’m going to replace it.
However, if it’s in relatively good shape, it’s kind of like putting a brand new tire on and getting a nail; you can fix it.
Stupid me, I was walking past my motorcycle the other day with a screwdriver in my hand, and I just glazed it. Unfortunately, it put a little scratch right up in my line of vision.
The rest of the windscreen is not ready to be replaced yet, so I decided to go ahead and fix it, but you could do the entire screen if you wanted to. This method is going to work for anything from mild to moderate scratches. It’s not going to work for any crack or a massive gouge.
What we’re going to do is mess up the rest of the shield around the scratch to bring it down to its level, and then fix what we’ve messed up. We’re going to do that using sandpaper and some metal polish.
Motorcycle Windshield Repair Kit
As I said, there are many ways to do this; there are specialty products and kits that you can buy specifically to do this. Some are all compounds, so you don’t have to use sandpaper, but you know what? This is easy and cheap to do.
This is something you can pick up starting from scratch, and I’m going to show you how to do it. Assuming you have nothing with a trip to Walmart for about thirty-five bucks, it beats a hundred and fifty dollars for a new windscreen.
The first thing we’re going to start with is relatively aggressive sandpaper, start with 800 wet dry paper. We are only going to be using it wet, it’s going to be moist at all times, and we do need to pre-soak them.

You’re going to put them in a pan of water and let them soak for at least ten minutes, and then You’re going to keep it wet while You’re doing the sanding.
If the scratches are relatively mild and it will be fairly obvious if they are, and it’s not what you would call a gouge or a deep scratch, you can start on the higher side with 800 sandpaper.
If yours is more aggressive, if it’s a pretty deep scratch, start with 600 sandpaper.
The easiest way to tell is to drag your fingernail across the scratch. If you barely feel it start with the 800 sandpaper, if you can feel it tug on your nail, then the scratch is deeper, so start with the 600 paper.
It’s going to save you some time because it’s going to be more aggressive and help take down that surrounding area a little faster.
The whole procedure is probably going to take you half an hour, which might take you 15 or 20 minutes, not including the soaking time.
After you get done with the sanding, which is going to mess everything up evenly, the scratch is going to be removed because it’s going to be so scratched around it, it all looks the same. Once you have sanded with the 800 paper, you can move onto the 2,000.
The 2,000 paper is going to make it look still bad, but it’s going to go from looking very scratched to just cloudy. It’s going to make it a lot smoother.
You are not going to feel like it’s gritty but it’s still not going to be clear. This is only going to take us a few minutes of hand sanding.
The 2,000 sandpaper is about the limit that you can get on a physical paper product; beyond that, you have to go to compounds.
The next thing up would be what’s called rubbing compound; it’s typically used in the automotive field for polishing paint and removing deep scratches.
You could think about it as a kind of twenty-five hundred grit. We’re going beyond that, and we’re going to what’s called metal polish.
It comes in many different brands; you can think of this as more of a 3000 or even 3500 grit; it’s superfine. It feels smooth in your hand, but believe me, there are fine abrasive particles in it.
To get the best from the rubbing compound, you will need something electrically powered; you do not want to be trying to do this by hand, as it will take you forever.
You can get one of those little buffing units that attach to your power drill, be aware you must regulate the speed because you cannot go fast from polishing any Lexan or poly glass. It will melt.
Heat is your enemy, so if you choose to do that, put it on its lowest speed. If you have a drill that has two different settings, one for drill and one for the driver, put it on the drive setting, that will keep it nice and slow.
I use an orbital polisher; you can get one for around 20 bucks at Walmart. It works well and is super easy. You don’t need anything fancy; you don’t need a porter cable polishing machine.
You’re going to be using a little bit of the edge of the orbital polisher and applying gentle pressure using the metal polish. It will be completely clear in just a few minutes.
Let’s Get Started
Now you have all the tools to remove the scratch, follow these simple instructions.
Step 1. Let’s get started by taking out a sheet of sandpaper and soak them in a pan of water until they are nice and soaked.
Step 2. If you have a spray bottle, fill it with water, this will save you continually wetting your sandpaper. If not, you’re just going to have to keep soaking your papers.
Step 3. Start by using small circles; you are just going to sand in the area around the scratch until it disappears and until the entire area looks uniformly scratched. This should only take you a few minutes.
Step 4. What you should have now is a nice even area of the really crappy looking windscreen. What you want to make sure is you don’t have any remnant of the original scratch left.
If you can still see the original scratch, continue until it has all gone. Use your fingernail again, and if you don’t feel any drag, you are good to continue to the next stage.
Step 5. Use a clean towel and wipe it off, make sure there’s no debris. Now you’re going to move on to the 2,000 grit do the same thing, and hit all of the areas that you just did. It’s going to get a little bit larger of an area, but it’s not going to look as bad, it should just look more cloudy and less scratchy.
Again, you should keep it wet, don’t apply too much pressure but just enough to keep the paper from skipping around. You should be able to feel it getting a lot smoother. It should feel just like a clay bar pulling out that first round of gunk.
You can even hear it as it hits the smoother areas, so you want to go until it’s an even surface and until you’re not feeling any differences in the areas around the original scratch.
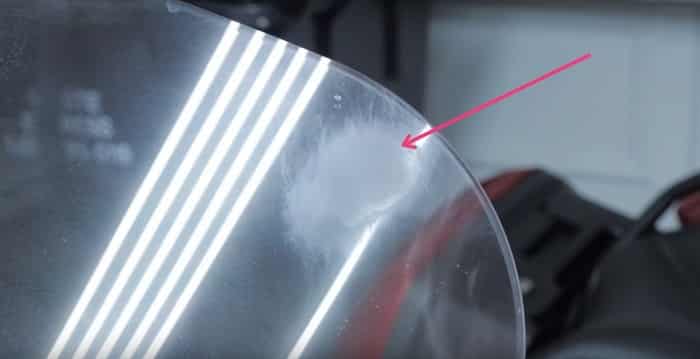
It should only take you a few minutes to finish, and again, it should look evenly cloudy. At this point, you shouldn’t be able to see any of the original scratch, only a cloud around the original scratched area. Again use your fingernail to see if you can feel the ridge, but at this point, it should be all gone.
Step 6. It’s now time for the super fine stuff. When I purchased my polishing attachment, it came in a six inches and a ten. In the interest of not making a huge mess, I’m stepping down and using my six-inch polisher instead of the ten; either one will get the same results.
You should use the outer edge of the disk with only slight pressure, just let it do its thing. This should not be a high-speed unit by any stretch of the imagination; just make sure your pad is on evenly.
Apply a little compound to the outer edge of the disk and work it in. (I use NOVUS 2 Fine Scratch Remover available from Amazon.com) . Continue with the compound and polishing disk until it’s clear. You want to make sure it doesn’t go dry, so stop and reapply the mixture as needed.
Every now and again, wipe off the compound from your motorcycle screen to check your work. If you can see an are of fine scratches or the area is still cloudy, continue gently with the compound until finally the scratch is gone and the screen is clear.
Will this method work 100% of the time every time? No, but it’s worth a try when you consider a new screen can cost up to $150 or more, and for the sake of some sandpaper and some compound, I think it’s worth giving it a try.