Deprecated: mb_convert_encoding(): Handling HTML entities via mbstring is deprecated; use htmlspecialchars, htmlentities, or mb_encode_numericentity/mb_decode_numericentity instead in /home/u598013642/domains/motorcyclegear101.com/public_html/wp-content/themes/acabado/functions.php on line 1901
I’ve got a real treat for you here today, I’m going to talk about how to do something that’s normally pretty hard if you do it the old conventional method and that is changing a motorcycle tire with zip ties.
Changing a motorcycle tire with zip ties is really easy, all you need is a packet of long strong zip ties and a lubricant like soapy water or baby powder and a strong friend to help you pull the tire off the wheel rim. We have a video that shows you in great detail so check it out below.
A Z rated tires are usually low profile and a little bit on the stiff and sticky side so they perform well at high speed it’s basically a performance tire for a street bike.
We are going to go through how to change a tire with zip ties to get a tire to collapse and come off the rim. The reason why this works and why it’s hard is if you don’t do it this way and you have aluminum rims or something that’s really lightweight you can do a lot of damage.
We’re going to use zip ties because they are easy to run in between the deflated tire and the wheel rim, once you do that it brings the bead closer together. The beads have a bigger circumference on the outside of the tire than the center where the spokes would be so by bringing them closer together you can remove the tire from the rim a lot easier.
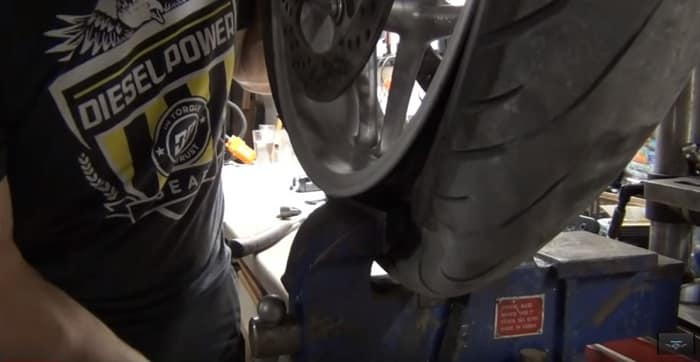
The first thing you need to do before you can start to push the zip ties between the tire and the rim is to break the bead seal from the tire and wheel rim. A tire shop has a machine that separates the tire from the rim, doing this n your garage this can be difficult. The easiest way I have found to do this is to use a bench vice.
Clamp the bottom part of your tire in the vice as per the image below. Close the vice together until the tire separates from the rim on both sides of the wheel. At this stage, you should be able to squeeze both sides of the tire together and see a gap where you can push the zip tie through between the tire and the inner part of the rim.
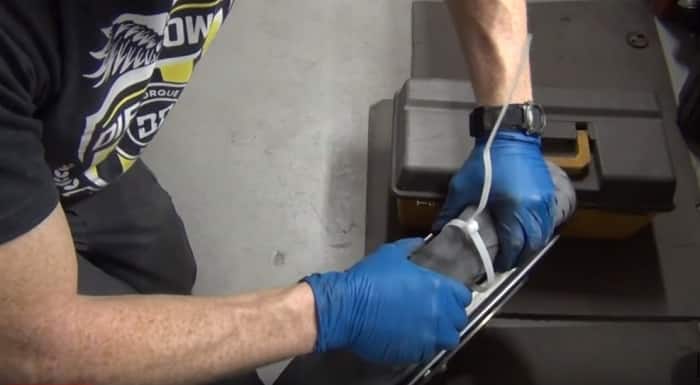
Your tire should be loose enough now so you can push your zip ties through, the zip ties you use should be long and strong enough to hold the tire together. Add your zip ties at the 3, 6, 9 and 12 o’clock position. Add as many as you need between the original ties so you can get the tire off the rim. As you pull the zip tie through connecting them loosely until you have them all added.
Once you think you have enough ties wrapped around the tire grab a friend as this part it a two-man job. While one person pushes the two sides of the tire together the other can tighten the ties, this will pull the tire together leaving a larger gap between the rim of the wheel and the bead of the tire.
Once you have all your ties as tight as possible you now need to lube the tire and rim, you can use baby powder or my favorite soapy water. Add the lube to the bead of one side of the tire and the top part of the rim. Use a brush if you are using soapy water or just shake the baby powder to one side of the rim and tire, this will reduce the friction between the tire and the metal rim making it easier to remove.
Once you have the lube added start pushing the tire towards the lubricated part of the rim, having another person holding the rim upright while you push the tire will stop any damage to any ABS systems you might have on the rim. Once you have the old tire removed you can now repeat with the new tire.
One thing to note when adding your new tire is that some tires can be directional, in other words, they need to be put on so the tire runs in a certain direction once you are back on the road. There is normally an arrow on the tire pointing in the direction it should travel. You may also find a marker of the tire that should be next to a marker on the wheel rim, check your owners manual for details.

To make it easier to get your new tire back onto the rim you will need your friend again to zip tie your new tire. Get your friend to squeeze the tire together while you use your zip ties to pull the beads of the tire together. Again add the lubricant to one side of the tire and rim and get ready to push making sure your tire is pointing in the right direction of travel.
Place the rim in between the tire and push the tire so that the two sides of the tire bead are on the inner part of the wheel rim. Once you have the tire on aligning the mark on the tire with the mark on your wheel rim. Once you have the tire on remove all the ties so the beads on your tire are as close as possible to the wheel rim.
Before you inflate the tire you might want to consider how you are going to balance the wheel and tire. A popular method these days is to use balancing beads, these beads are inserted into the tire so if you are going to use this method now would be the time to add them. I have an article on balancing motorcycle tires with beads that will help.
Add a new valve back onto the wheel rim and get ready to inflate. If you don’t have an airline at home take your rim and new tire to a local garage to inflate, inflate the tire without the valve stem initially.
Once you have inflated the tire enough the tire will pop, this means the tire beads are fully expanded which will seal the tire against the rim. When you have heard the pop remove the airline letting the air back out. Insert the valve stem and inflate again to the correct pressure for your bike, again consult your bike manual for the correct tire pressures.